Are you looking for a solution how to disable Gutenberg and keep the classic WordPress editor on your WordPress site ? Now the Gutenberg is default editor in WordPress version 5.0. It simply means Gutenberg WordPress editor replaced the classic WordPress editor.
But still many WordPress users are not ready to use it and want to know how to keep the classic editor on my WordPress site? In this article we will explain you how to easily disable Gutenberg and keep the classic editor in WordPress.
What is Gutenberg?
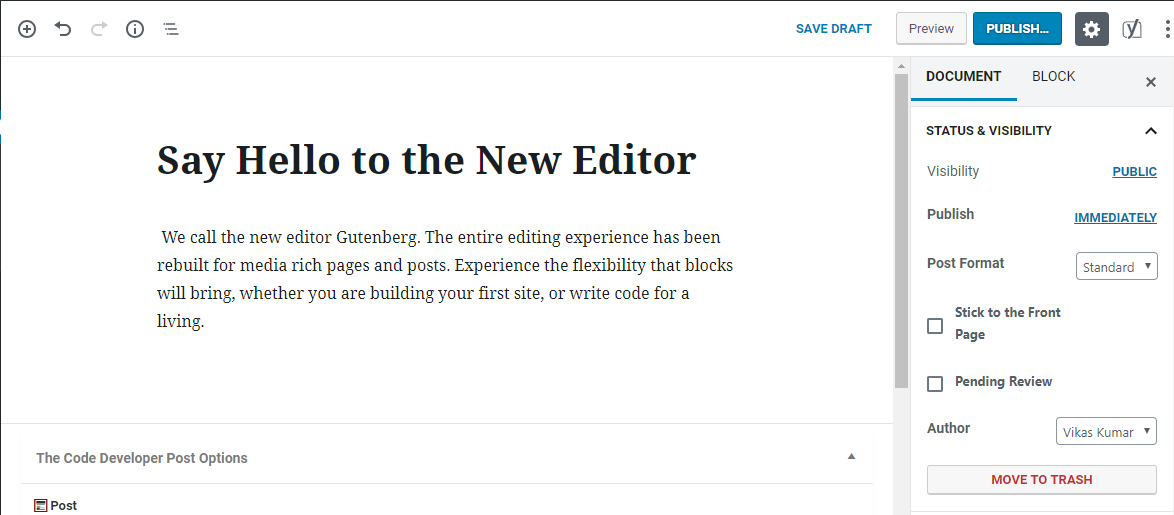
Gutenberg is the project name for the new WordPress block editor, which replaced the WordPress TinyMCE editor as the default WordPress editor in WordPress 5.0. When you open the new WordPress editor for the first time you’re obviously looking for the interface we have all grown habituated to.
While the Gutenberg editor offers an exciting new post and page editing experience. The entire editing experience has been rebuilt for media rich pages and posts.
Why Disable the Gutenberg Editor in WordPress?
There are a few reasons that you may want to disable the WordPress Gutenberg editor for now:
- You love to work with Classic editor and don’t want to learn a new interface.
- Your manage sites for clients and you don’t want to force them to learn a new interface.
- You don’t familiar with the block editor and not going to be ready for the new editor.
Disable Gutenberg and Keep the Classic Editor in WordPress
Let’s take a look at how to easy to disable Gutenberg until you’re not ready for it and keep the classic editor your WordPress site. You can disable the Gutenberg editor entirely or selectively phase it in—the choice is entirely yours.
Method 1 – Install the Classic Editor WordPress Plugin
For this method, we will be using the Classic Editor plugin which is developed and maintained by the core WordPress contributors.
Step 1: Install And Activate The Plugin
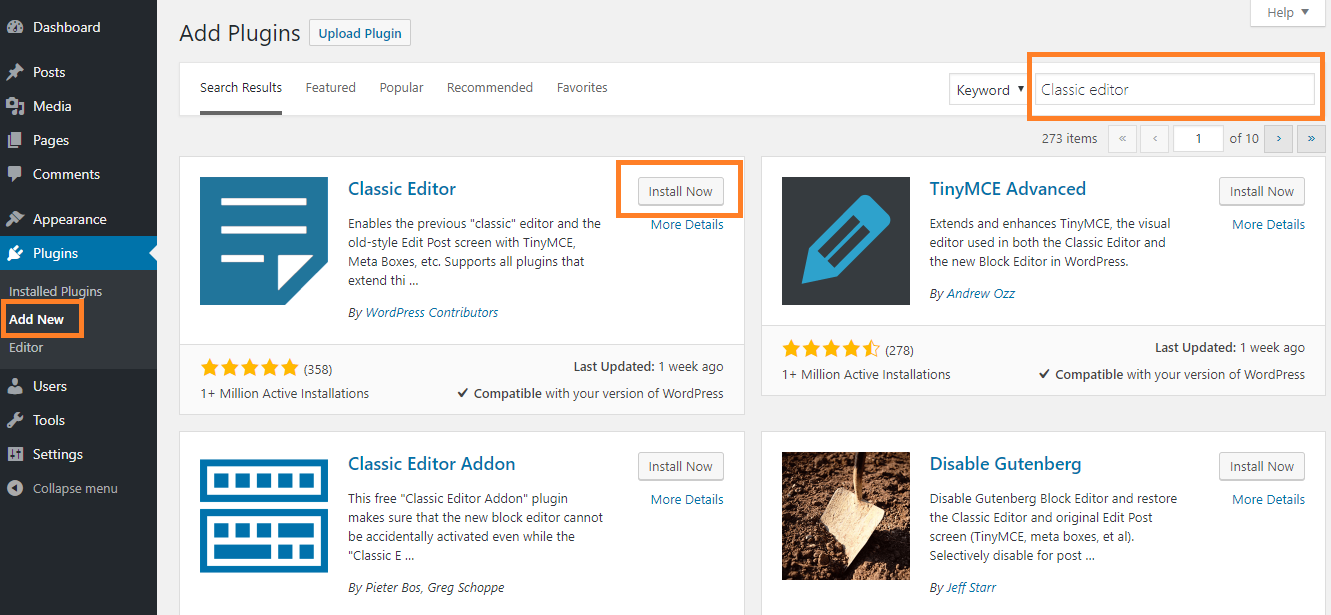
To get started, first you need to install the Classic Editor by going to Plugins → Add New and searching for it by name Classic Editor , Then click on Install Now and activate the plugin.
Step 2: Configure Classic Editor Plugin
Once you’ve installed and activated the Classic Editor plugin, you need to configure whether to:
- Only use the Classic editor
- Use both the Classic editor and the Block editor (Gutenberg editor)
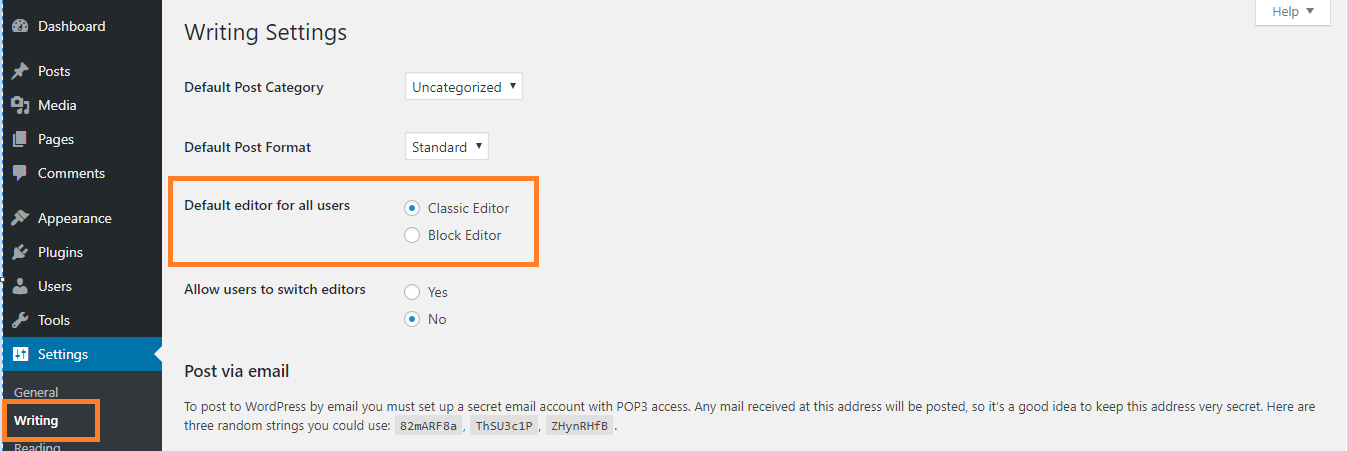
To do that, go to Settings → Writing in your WordPress dashboard. Then, look for the Classic editor settings options:
If you chose “Classic Editor” with “No” checkbox option then 100% disable the Gutenberg editor, you’re done!
If you want to chose to switch between Gutenberg and the Classic editor on a post-by-post basis, then you need to choose “Classic Editor” with “Yes” checkbox option.
Method 2 – Install the Disable Gutenberg WordPress Plugin
If you want to disable Gutenberg for certain user roles and post types, then this method will help you do that.
Step 1: Install And Activate The Plugin
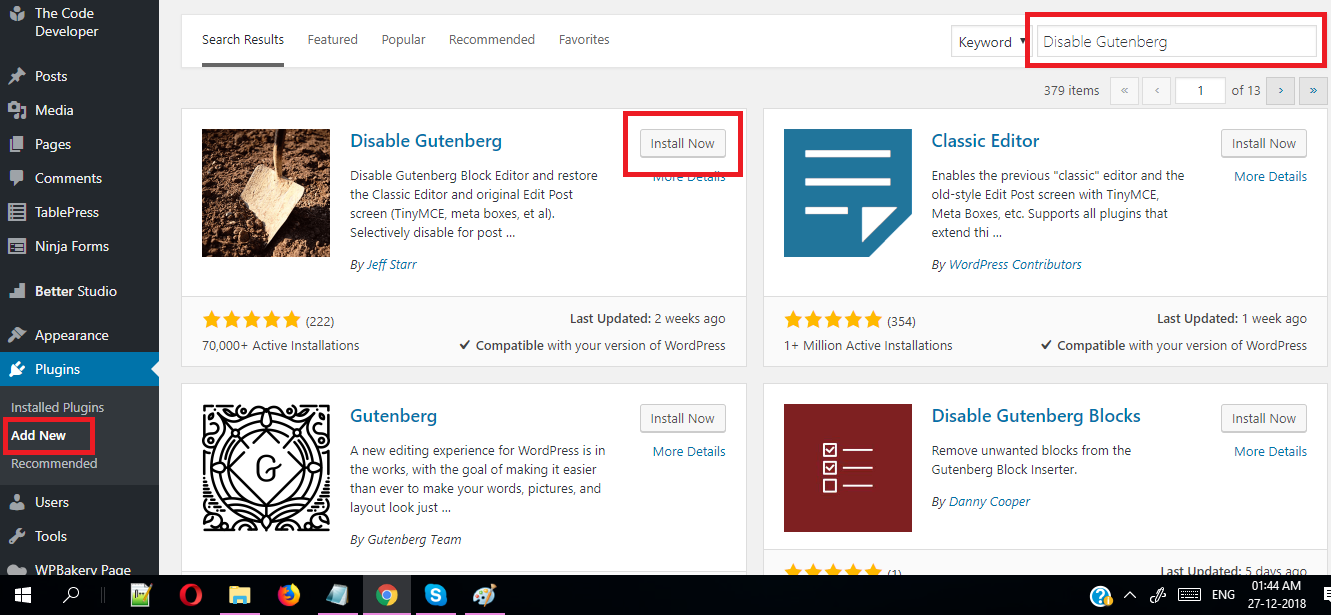
To get started, first you need to install the Disable Gutenberg by going to Plugins → Add New and searching for it by name Disable Gutenberg, Then click on Install Now and activate the plugin.
Step 2: Configure Where To Disable Gutenberg
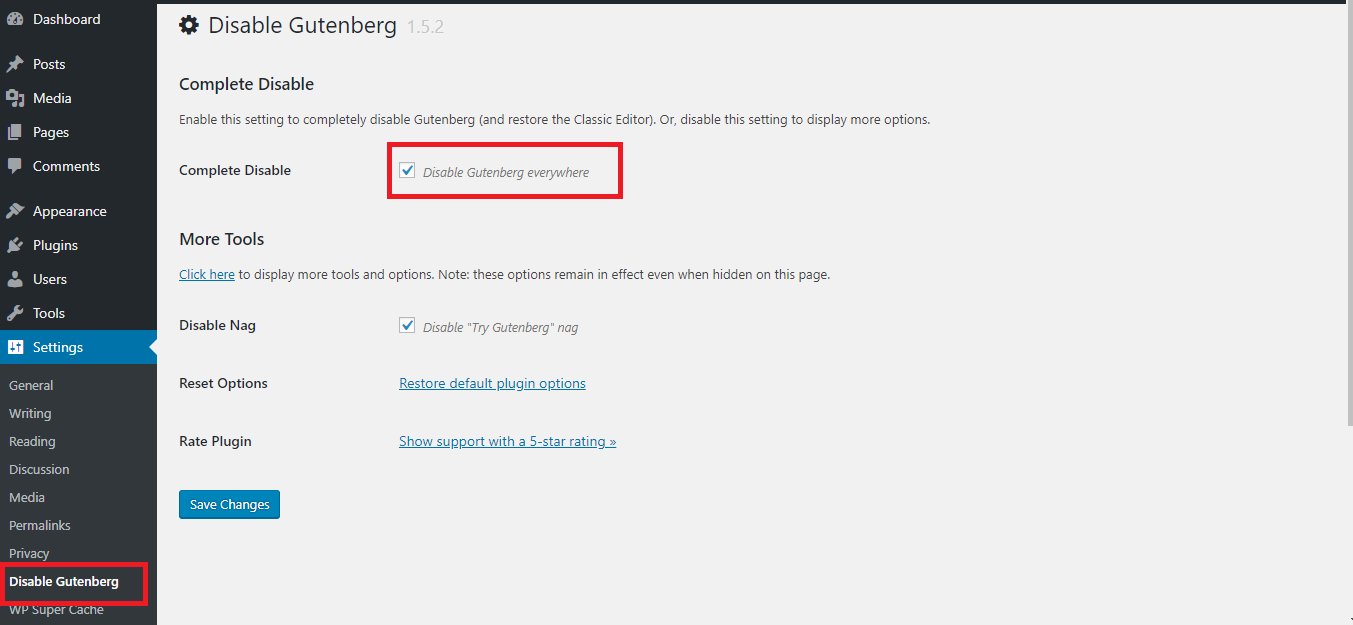
Once you’ve installed and activated the plugin, go to Settings → Disable Gutenberg to configure it. By default, it will disable Gutenberg everywhere.
I hope this article helped you learn how to Disable Gutenberg and Keep the Classic Editor in WordPress.
Please feel free to comment below, your suggestion and problems if you face – we are here to solve your problems.

