

In this tutorial we will show you how to Install Yii With XAMPP On Windows Using Composer step by step. Yii uses Composer, a dependency management tool, as the officially supported method for installation. Through Composer it’s simple and easy to installing latest Yii 2.0 version by running a single command.
To Install Yii With XAMPP On Windows Using Composer, follow the below given steps:
- What Is Yii?
- Server Requirements
- Install XAMPP
- Install Composer
- Installing Yii
- Configuring the Host File in Windows
Let’s get started:
#1. What Is Yii?
Yii is an incredibly reliable, well-designed, high-performing framework for PHP, similar to CakePHP or Laravel.
Currently, there are two Yii 2.0 application templates available:
- Basic Application Template – a basic frontend application template.
- Advanced Application Template – consisting of a frontend, a backend, console resources, common (shared code), and support for environments.
In this article we will describe how to install Yii with the Basic Project Template.
The Basic Project Template is fit for developing 90 percent of Web applications. If you are a beginner to Yii, we highly recommended use to the Basic Project Template.
#2. Server Requirements
Before Install Yii using Composer make sure following requirements are enabled and installed on your machine:
1) The minimum PHP version required should be 5.4 or greater. For it we will install XAMPP on Windows.
#3. Install XAMPP
First thing you need to do is download the latest version of XAMPP that supports PHP 7.3.1 and Install it on Windows. For more details, see our step by step guide on How To Download And Install XAMPP On Windows.
#4. Install Composer
The next thing you need to do Install Composer On Windows With XAMPP. This process will take another 5-10 minutes. For more details, see our step by step guide on:
How to Install Composer On Windows With XAMPP
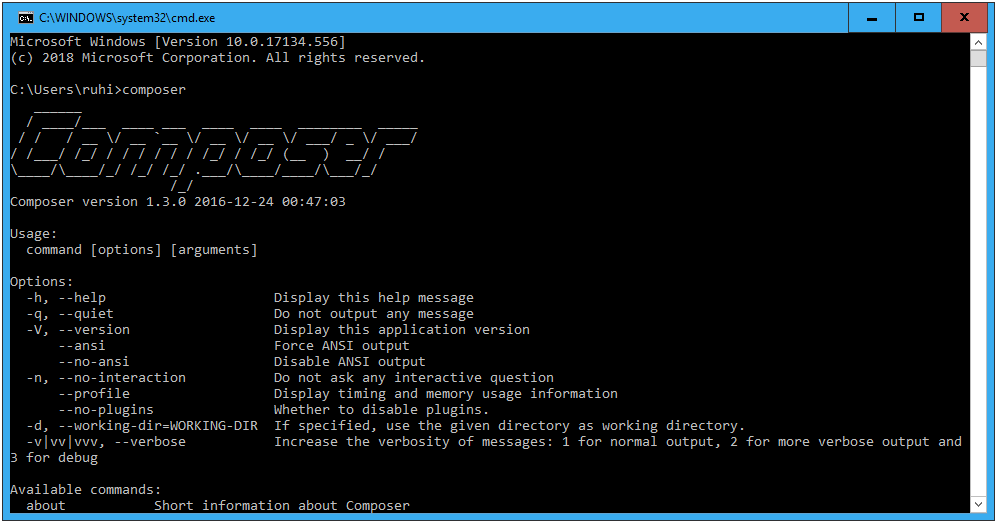
To check the composer installation, Type the following command in command prompt:
composer
#5. Installing Yii2.0 Basic Application Template via composer
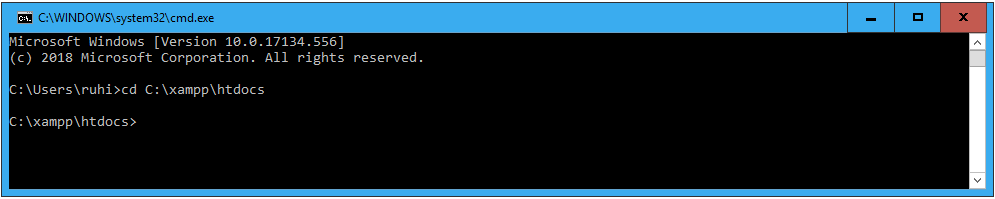
To install Yii, First of all, you have to go C:/xampp/htdocs directory, to navigate it type following command in your command prompt:
cd c:/xampp/htdocs
Now we are ready to install Yii, run the following command to install latest Yii version:
composer create-project --prefer-dist yiisoft/yii2-app-basic yiiproject
After running this command it should start downloading dependencies that are required to create the Yii project.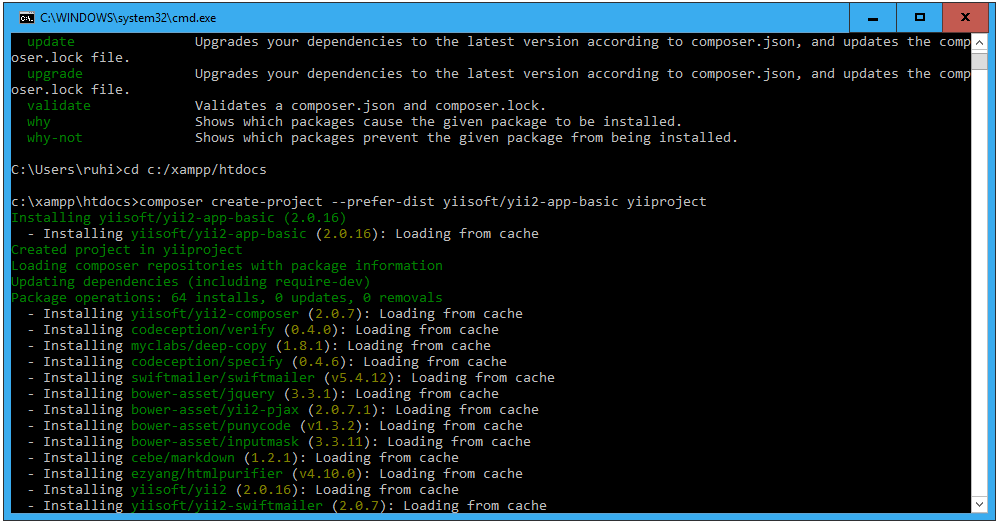
This installation may take a few minutes after executing the above command, so wait until you get success message like in the below image.
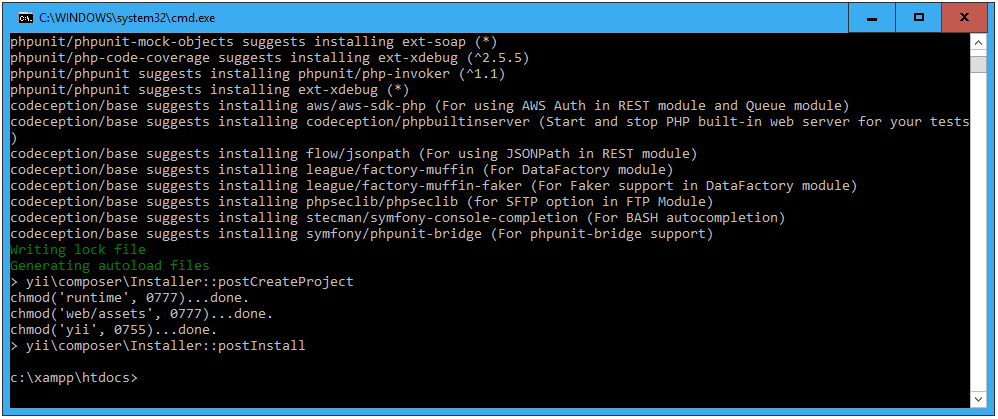
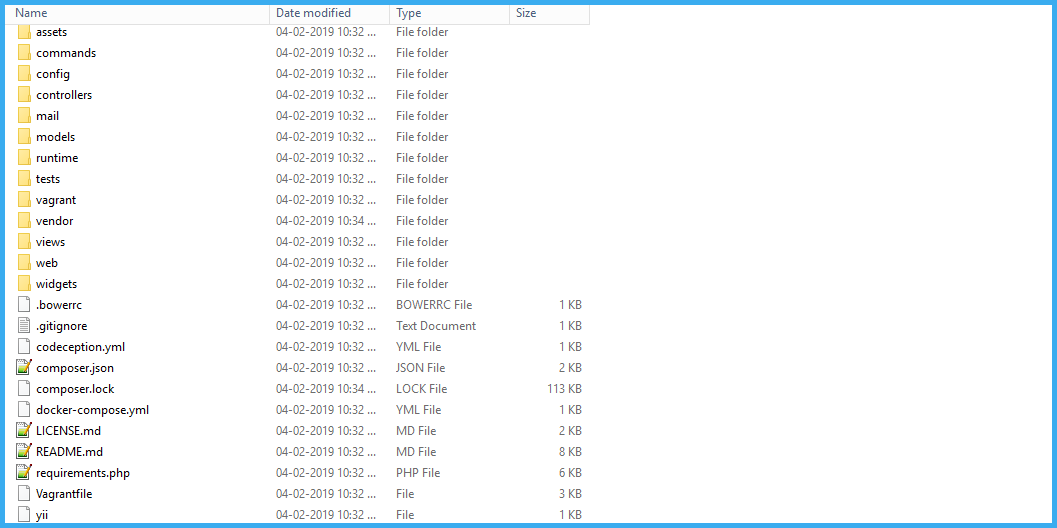
It installed Yii2 framework to a folder named yiiproject inside the C:/xampp/htdocsdirectory, you can use your own directory name in place of yiiproject (last part in the above command).
When it completed, it will create following directory schema:
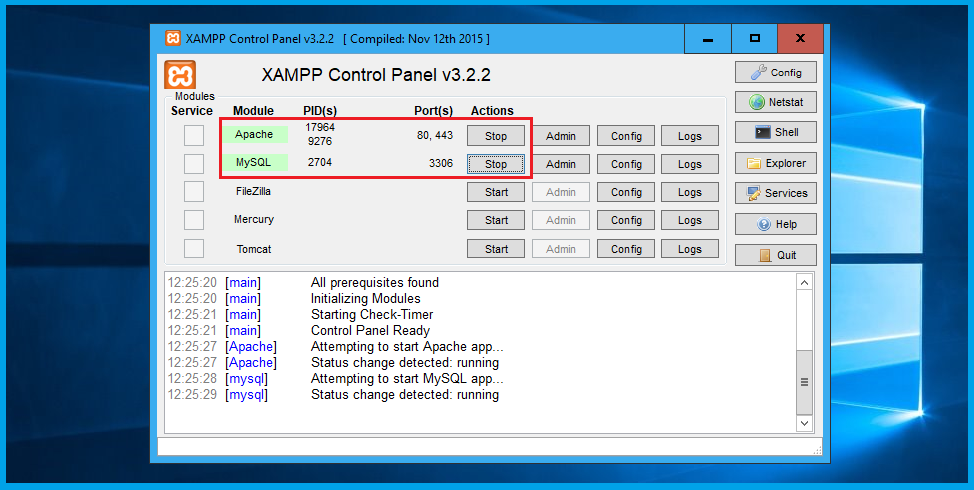
Now everything is ready, start the Apache server using the XAMPP control panel.
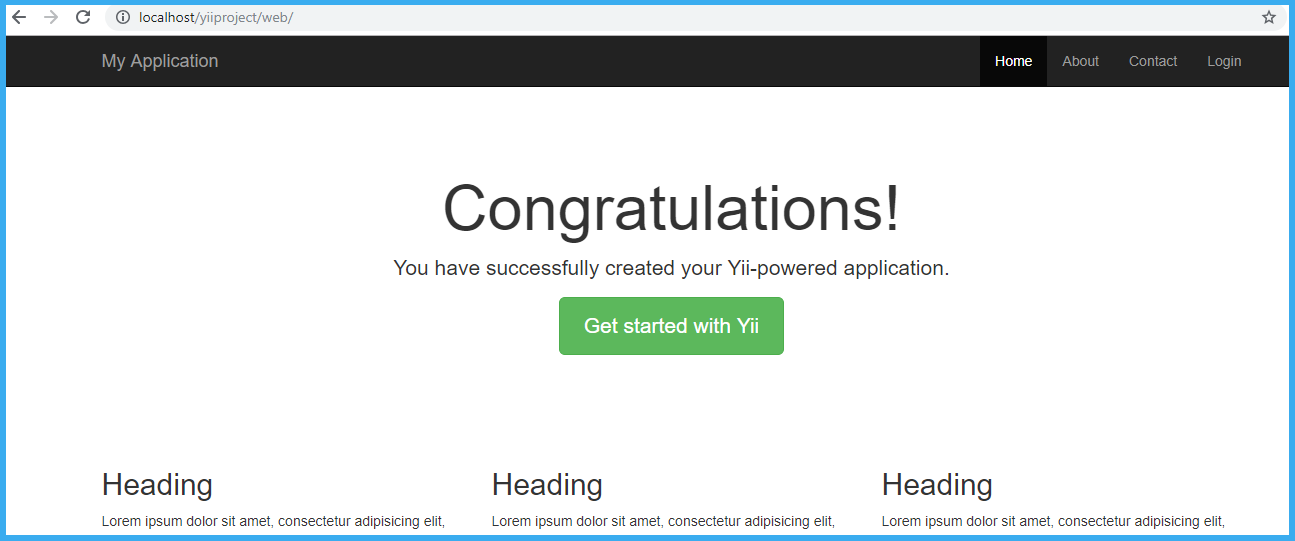
Finally your Yii2 basic application is now ready, type this URL http://localhost/yiiproject/web/ in your browser and press enter.
#6. Configuring the Host File in Windows
If you want to customize the local browser addresses for your site. To do this, we need to configure a Virtual Host in XAMPP for a Yii project and in this example we want to configure the domain localhost.yiiproject.com for our project. To do so, edit httpd-vhosts.conf file which is located within C:\xampp\apache\conf\extra\httpd-vhosts.conf
Add following code snippet at the end of your file:
# VirtualHost for localhost.yiiproject.com

<VirtualHost *:80>
    DocumentRoot "C:/xampp/htdocs/yiiproject/web"
    ServerName localhost.yiiproject.com
    <Directory "C:/xampp/htdocs/yiiproject/">
      Options Indexes MultiViews FollowSymLinks
      AllowOverride All
      Require all granted
    </Directory>
</VirtualHost>
After this, apache server is listening to localhost.yiiproject.com connections, but we have to configure our hosts file that allows to redirect localhost.yiiproject.com to the localhost , to do so, edit the hosts file which is located within C:\Windows\System32\drivers\etc
Add following code snippet at the end of your file:
127.0.0.1 localhost
127.0.0.1 127.0.0.1
127.0.0.1 localhost.yiiproject.com
After set up Virtual Host in XAMPP, restart the Apache server using the XAMPP control panel, then you can use this URL localhost.yiiproject.com in your browser.
Final Words
That’s it! I hope this article helped you learn to How To Install Yii With XAMPP On Windows Using Composer.
Please feel free to comment below, your suggestion and problems if you face – we are here to solve your problems.
Hi, there
thank you for explanation, it really helped me
thank you
thank you so much. it was really helpful